 SW-04 · Troubleshooting & Repairs
Telegraphing happens when a raised or uneven joint in the subfloor panel transfers upward through the underlayment and plank, showing up as a visible ridge or shadow line on the finished LVP surface. It’s almost never the plank material failing on its own — it’s the subfloor’s flatness, seam treatment, or panel movement being copied by a thin, flexible wear layer that has nowhere to hide a defect. The thinner the plank and the less forgiving the underlayment, the more likely any subfloor irregularity shows through.
What Telegraphing Actually Looks Like
Most installers see it first as a faint straight line running across a room, usually where two sheets of plywood or OSB meet, or where a patch of self-leveling compound stops short of feathering out. Under raking light — low sun through a window, or a work light held at a low angle — the line reads as a ridge or a shadow. It’s a cosmetic problem more than a structural one in most cases, but on a finished job it reads as a defect to the customer, and it’s one of the more common callback triggers in the resilient category covered across the LVP and vinyl installation archive.
Why LVP Shows It More Than Other Floor Types
Rigid-core products (SPC/WPC style constructions) and thinner flexible LVP both rely on the substrate underneath to be reasonably flat and continuous. Carpet and cushion-backed sheet products absorb small irregularities in their padding or backing. Thick engineered hardwood spreads load across a wider, stiffer plank. LVP, especially at common commercial and residential gauges, has comparatively little mass to bridge a step or gap at a seam, so whatever profile exists in the subfloor tends to print through, particularly under foot traffic or with light glancing across the surface.
.jpg)
The Main Causes Behind Telegraphed Seams
Several separate issues can produce the same symptom, which is part of why diagnosing it after the fact is harder than preventing it during prep. The general principles below are common across the trade, but the manufacturer’s own written installation instructions for the specific product always govern what’s required on a given job.
- Unfilled or unsanded panel seams. Where two sheets of plywood or OSB butt together, there’s often a slight step from panel thickness variation or from fasteners not seated flush. If that step isn’t filled and feathered, it becomes the telegraph line.
- Fasteners sitting high. A screw or staple head left slightly above the panel surface creates a small bump that reads through thin LVP almost immediately, even when the rest of the floor is flat.
- Panel movement at the joint. Subfloor panels expand, contract, or flex slightly at unsupported or poorly fastened seams. Over time that small amount of movement works a fine ridge into the flooring above it, even on a floor that looked acceptable on install day.
- Self-leveling compound stopped too short. When leveler is used to bridge a seam or low spot but isn’t feathered out far enough, the edge of the patch itself becomes a new seam that can telegraph.
- Underlayment too thin or too dense to absorb minor irregularity. Some underlayment products are chosen for acoustic or moisture performance rather than for masking subfloor texture, and that’s a legitimate trade-off — but it means flatness prep matters more, not less.
- General flatness out of tolerance. A commonly cited industry figure for click-lock LVP flatness is around 3/16 inch over a 10-foot span, though the applicable number is whatever the manufacturer’s data sheet specifies for that product. Seams sitting outside that range are prime telegraph candidates.
Subfloor Type Changes the Risk Profile
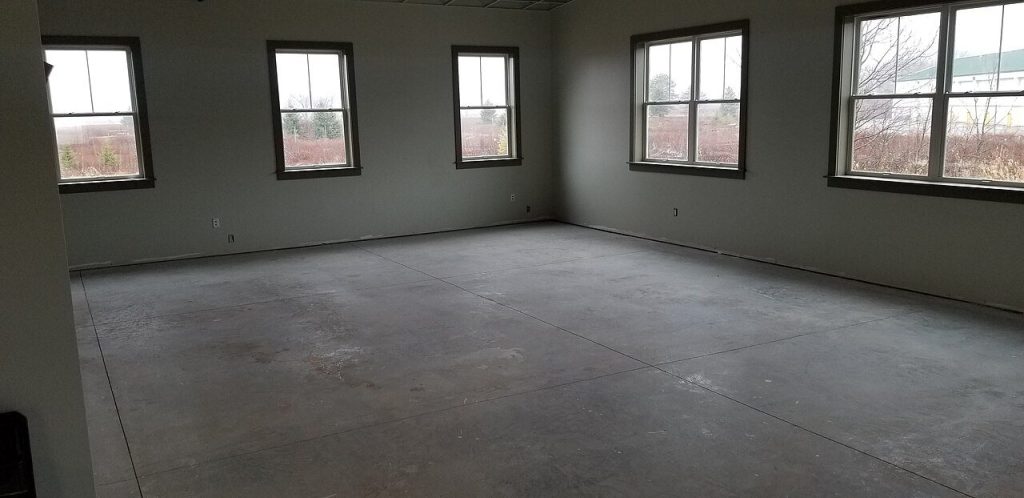
Plywood, OSB, particle board, and concrete each behave differently at their joints, and the prep steps differ accordingly. Working over plywood generally means checking for panel gaps, fastener pattern, and any warped or cupped sheets before flooring goes down, a topic covered in more detail for that substrate. Particle board subfloors carry their own set of moisture and swelling concerns at seams that plywood doesn’t share to the same degree. Concrete slabs don’t have panel seams in the same sense, but they do have control joints, cold joints, and cracks that behave almost identically to a wood-panel seam if they aren’t addressed as part of concrete prep before flooring goes down.
| Subfloor type | Typical seam risk | Common prep focus |
|---|---|---|
| Plywood | Panel step, fastener pop, sheet warp | Sanding/filling, re-driving fasteners flush |
| OSB | Edge swelling, panel gap, surface texture | Gap fill, moisture check, flatness pass |
| Particle board | Swelling at joints, softness at seams | Moisture control, panel condition check |
| Concrete | Control joints, cracks, cold joints | Grinding high spots, filling low spots, joint treatment |
How Underlayment and Product Choice Factor In
Underlayment can soften minor texture but it isn’t a substitute for a properly prepped subfloor, and it was never designed to bridge a real step at a seam. Cork, foam, and felt underlayments each have different compression characteristics, and a product chosen for sound control in a multifamily setting may perform very differently under a seam than one chosen purely for comfort underfoot. Where a self-leveling underlayment is used to correct flatness ahead of LVP, feathering technique and primer choice both affect whether the patch edge disappears into the surrounding subfloor or becomes its own visible line later. Wear layer thickness also plays a role: a thicker wear layer with a stiffer rigid core generally resists telegraphing better than a thin, flexible plank laid directly over a rough seam, though thickness alone won’t fix a subfloor that’s genuinely out of flatness tolerance.
Prevention Steps Worth Building Into the Prep Schedule
- Walk the subfloor with a straightedge or laser and check flatness against the flooring manufacturer’s published tolerance before ordering material, not after it arrives — a step outlined in more detail in a dedicated subfloor flatness guide.
- Re-drive or replace any fastener sitting above the panel surface rather than relying on the underlayment to compress over it.
- Fill and feather panel seams and any low spots with an appropriate patching or leveling compound sized to the manufacturer’s instructions, feathering well beyond the edge of the defect rather than stopping at it.
- Confirm panel layout and joint pattern don’t line up directly under where plank end joints will fall, since a coincidental stack of two irregularities in the same spot is more likely to show.
- Match underlayment selection to the job’s acoustic, moisture, and flatness needs rather than defaulting to whatever is on the truck.
General subfloor and moisture prep principles like these are covered more broadly in the subfloors and moisture archive, and the full install sequence sits inside the site’s LVP installation guide hub for anyone building a punch list before a job starts.
Frequently asked questions about telegraphing subfloor seams through LVP
Can telegraphing show up months after a good-looking install?
Yes. A seam that looked flat on install day can telegraph later if the subfloor panel shifts slightly, a fastener works loose, or seasonal moisture swings cause panel edges to move. That’s why fastener pattern and seam fill matter even when the floor passes a visual check at handoff.
Does thicker LVP fix telegraphing on its own?
A thicker, more rigid core resists it better than thin flexible plank, but thickness alone doesn’t correct a subfloor that’s outside the manufacturer’s flatness tolerance. Filling and leveling the seam is still the more reliable fix, with product choice as a secondary factor.
Is telegraphing covered under a flooring warranty?
Most manufacturer warranties tie flooring performance to proper subfloor prep, so a telegraphed seam traced back to unfilled panel joints or flatness outside spec is often treated as an install issue rather than a product defect. The written warranty language for the specific product governs that determination.
What’s the fastest way to check for a seam before flooring goes down?
Run a straightedge or laser across every panel joint and mark any spot where you can slide a gap gauge under it or feel a step by hand. Sight down the floor with a low work light at seam locations, since raking light reveals ridges that are easy to miss standing directly over them.
Floor Talks publishes general industry information, not professional installation, structural or contractual advice. Manufacturer instructions and local building code govern any specific job and override anything written here.
Related reading
the flooring industry briefing, 2026 Silane Adhesive Outlook for Wood and Resilient Floors, 2026 Silane Adhesive Flooring Shift for Wood and Glue-Down LVP.