 SW-04 · LVP & Vinyl Installation
Most floating-vinyl guides forbid installing cabinets, islands or other permanent fixtures on top of the floor, because they pin it.1 2 Install casework first and run the floor to it with the expansion gap.3 One guide allows wall-mounted cabinets and freestanding islands on the floor, and fastening only with oversized holes.4
A kitchen is the hardest room for a floating floor. It has a long cabinet run, often an island, heavy appliances, a sink and a dishwasher that can leak, and on commercial work the same set of problems shows up in break rooms, nurse stations and reception desks. The floor has to move, and every piece of casework is a fixed object it must not be trapped by. The guides handle this with one main rule and a few exceptions.
The main rule: casework first
Almost every floating-vinyl guide says the same thing. Marquis says not to install fixed objects such as cabinets on top of the flooring.5 EverStep says not to install cabinets on top of floating LVP.6 Timeless lists cabinets, heavy furnishings, fireplaces and other built-ins as things that must not be installed on the floor, because they restrict its ability to expand.2 National Flooring Products puts it most bluntly: never install cabinetry, islands or other permanent fixtures on a floated floor.1
Daltile turns the rule into a sequence. Permanent cabinets, vanities, islands and similar items should be installed first, and kitchen cabinets must be installed before the floor.3 MSI says the same for remodels: vanities, cabinets and tubs go in first, so the floor can be finished around them.7

The gap at the toe-kick
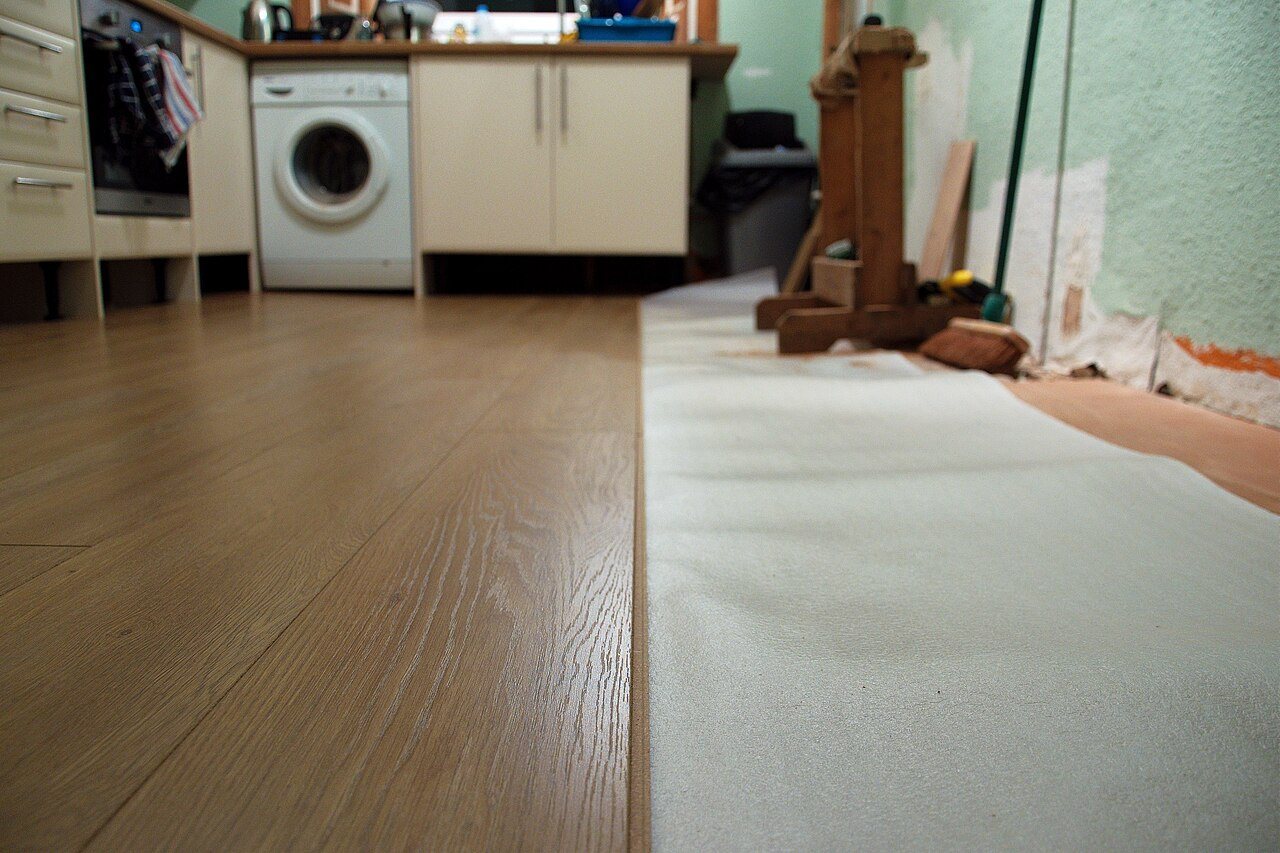
Running the floor to the casework means leaving the expansion space there too. The guides set it at the same size as at the walls. Marquis keeps its planks 5/16 inch from all vertical surfaces, cabinets included.5 EverStep keeps 1/4 inch around cabinets, pipes and other obstacles.6 Daltile keeps 3/8 inch around cabinets, pipes and toilet flanges.3 The gap is covered by a toe-kick molding or quarter round fastened to the cabinet base, never to the floor.
Islands need the same treatment on all four sides. They also break the floor into narrow strips between the island and the cabinet run. Those strips are where a floor pinned at both ends will peak first.
The exception: one guide allows more
Elite's Välinge-lock instructions take a different position. Cabinets may be installed on top of its SPC flooring if they are wall-mounted, and center islands may be installed on top if they are freestanding.4 If cabinets or islands are fastened to the floor, Elite requires a 3/4 inch expansion hole where the bolts pass through the SPC into the subfloor.4 It also allows cabinets and islands to be installed and fastened on SPC that has been fully glued down.4
That exception is product-specific. It does not carry over to another manufacturer's floor, and it depends on the cabinet hanging from the wall or standing free, not being screwed down through the planks. On a commercial job with mixed suppliers, assume the stricter rule unless the specified product's guide says otherwise in writing.
Why the rule matters more on commercial floors
Commercial casework is heavier and longer than residential, and it is usually fixed. A nurse station or a reception desk may be anchored to the slab. A break room may have a run of base cabinets plus a refrigerator, an ice machine and a dishwasher in a row. Each is a fixed object. Laid under all of them, a floating floor has no free edge to move toward. That is why sequencing matters: the millwork contractor installs, then the flooring contractor runs the floor to it with a gap.
The alternative is a glued-down floor in those areas. A fully adhered floor does not need to float, and Elite's exception for fully glued SPC shows how some guides handle it.4 Where a space mixes floating and glued areas, the transition between them needs its own detail.

Appliances in the run
Large refrigerators sit in the same line as the cabinets. National Flooring Products requires its expansion gap around large Sub-Zero style refrigerators and appliances, the same as at walls and plumbing fixtures.1 Appliances that roll out for service also need protection when they move. The appliances guide covers loads, pads and moving equipment across a new floor.
Water at the sink and dishwasher
Kitchens leak. A floating floor that runs under a dishwasher or a sink base can carry water under the planks to places nobody looks. Daltile asks for expansion spaces around potentially wet areas, such as refrigerators, to be filled with 100% silicone caulk.3 Silicone keeps the joint flexible. Elite approves only silicone where caulk is needed, because acrylic hardens and stops the floor from floating.4
Sequencing checklist for kitchens and casework
- Confirm on the drawings and in the schedule that casework, islands and fixed equipment go in before the floor.
- Read the flooring guide for what it allows on top, if anything, and in what conditions.
- Leave the product's expansion space at every cabinet base, island side and appliance.
- Fasten toe-kick trim to the casework, not to the planks.
- Seal wet-area gaps with silicone where the guide calls for it.
- Where casework must sit on the floor, consider gluing that area down, and detail the transition.

Sources
- NFP, “Architect’s Choice LVP Installation Guide”. my-nfp.com/resource/architects-choice-lvp-installation-guide
- Timeless Designs, “Click Floating Luxury Vinyl Installation Instructions”. timelessdesignsflooring.com/wp-content/uploads/2023/05/TD-Rigid-Core-Ins
- Daltile, “ProSeries Luxury Vinyl Flooring Installation & Care Guide (Rigid Core Click, Glue Down)”. s1.img-b.com/build.com/mediabase/specifications/daltile/1996309/daltile-
- Elite Flooring, “Välinge Installation Guide (Woodlands)”. eliteflooringusa.com/links/install-instructions/Elite-Installation-Guide
- Marquis Industries, “Rigid Vinyl Plank Installation Instructions (Angle)”. marquisind.com/static/resources/Angle_Angle%20Installation%20Instruction
- EverStep Flooring, “LVP Click Lock Installation Guidelines”. everstepflooring.com/lvp-click-installation-guidelines/
- MSI Surfaces, “Installing Luxury Vinyl Flooring in the Bathroom”. msisurfaces.com/blogs/post/2019/11/26/installing-luxury-vinyl-flooring-i
General information for the flooring trade. This article was drafted with AI assistance and checked against the sources listed above; the manufacturer's current instructions and the project specification govern any real job. If something here is wrong or out of date, tell us.
.jpg)
.jpg)

