 SW-03 · Adhesives & Underlayment
Most glue-down failures come from how the adhesive is used. Armstrong explains that oversized notches leave trowel-mark show-through and can cause swelling, undersized ones do not hold the floor, and laying flooring too soon can make it bubble.1 Flooring laid after the working time will not bond. Slab moisture slows setting.1 Roll with a 100 lb roller, and check again after 1-2 hours.2
Glue-down vinyl plank is the usual choice for commercial floors: corridors, clinics, retail and anywhere with rolling loads. When it fails, the symptoms are familiar. Planks lift at their edges or ends, bubbles appear, adhesive oozes up at the joints, or trowel lines show through the surface. Nearly all of these trace back to a handful of adhesive variables. The adhesive makers' own explanations are the clearest guide.
The trowel notch
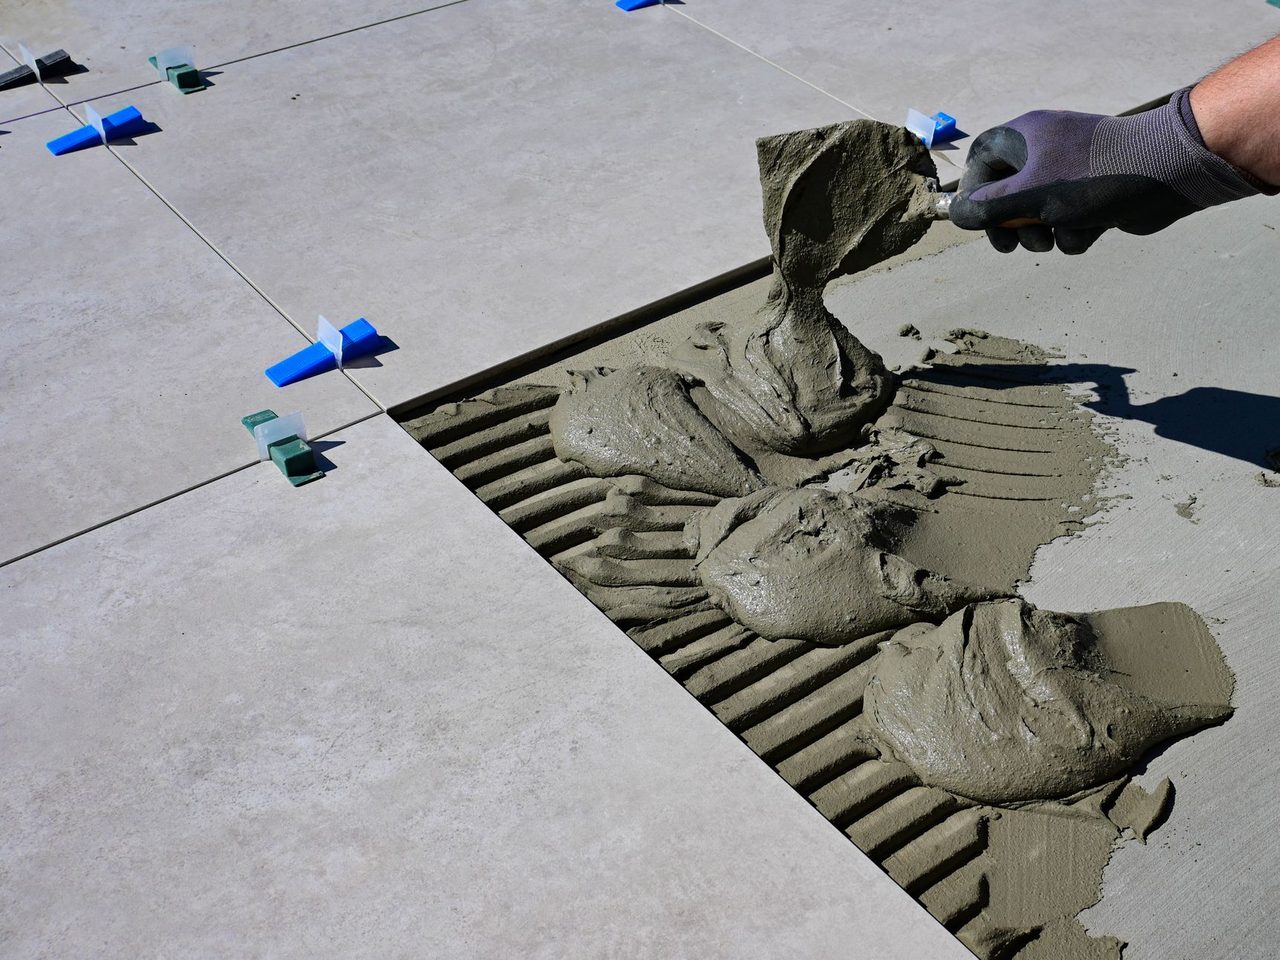
The notch controls how much adhesive goes down. Armstrong explains that trowels are chosen to place just the right amount of adhesive.1 If the notches are too large, they spread too much adhesive, which can lead to trowel-mark show-through and bleeding at tile joints. Too much adhesive may also cause swelling and buckling.1 If the notches are too small, the adhesive will not hold the flooring down.1 Its advice is simple: always check the adhesive label for the proper notching.1
Notches wear. A trowel that has been dragged over concrete all day spreads less than a new one, so check the notch during the job, not just at the start. Daltile lists a 1/16”x1/32”x1/32” U-notch trowel for dry-back LVP in its glue-down guide.3 Other products and adhesives call for other notches, which is why the label matters.
Open time and working time
Two timings decide whether the floor bonds. Armstrong defines open time as the time the adhesive is left to set before it is covered with flooring. Temperature, humidity and the porosity of the subfloor all affect it.1 Placing tile into adhesive too soon can make it move and ooze adhesive up between the joints. Placing sheet flooring too soon can make it bubble.1
Working time is the window after the adhesive is ready, during which flooring will still bond. Armstrong is blunt: placing flooring into the adhesive after the working time has passed will result in a failed installation, because it will not bond.1 A crew that spreads a whole room before starting to lay invites both problems. The first planks go into wet adhesive, and the last into adhesive past its window.
"Dry to the touch"
Many resilient adhesives are laid once dry to the touch. Armstrong says this means no adhesive transfers to your fingertips when you touch the ridges lightly.1 All of its resilient tile adhesives require that before installation starts.1 EverStep's transitional adhesive can be used wet on porous surfaces, after a flash time of 5-10 minutes. On non-porous surfaces it is left to dry completely, from yellow to tan, and the flooring laid within 3 hours.2 Check which method the adhesive and substrate call for. The same adhesive can be used two ways.
When the adhesive will not set
Slow setting is a warning sign. Armstrong lists the causes when adhesive is still wet long after its stated open time. A larger notch than recommended puts down too much adhesive. Moisture in the subfloor retards setting.1 If the building is not climate controlled on hot, humid or rainy days, moisture can condense on the adhesive surface and severely slow it.1 Each of those also weakens the final bond. Do not lay flooring into adhesive that is not behaving as the label says. Find out why first.
Moisture and temperature
Glue-down floors depend on a dry, conditioned slab. EverStep's limits for its transitional adhesive are 3 lbs. per 1,000 square feet in 24 hours by ASTM F1869, and no more than 80% RH by ASTM F2170.2 It holds the area at 65° to 85° F and 30% to 60% relative humidity for 72 hours before, during and after installation.2 INSTALL, the installers' training organization, notes that adhesives for LVT, VCT and sheet vinyl can re-emulsify in high moisture, causing tiles to shift, curl or lift.4 A floor that bonded well and then let go weeks later points to moisture. See moisture testing.
Rolling
Rolling pushes the flooring into the adhesive so it transfers fully. EverStep says the adhesive must transfer to the floor product to ensure a proper bond. After installation, the floor is rolled and cross-rolled with a 100 lb sectional roller, with a hand roller where the big roller cannot reach.2 It asks installers to check again after 1-2 hours and roll again if necessary.2 Daltile lists a 100 lb roller and a hand roller among its glue-down tools.3 An unrolled edge or a missed area is where lifting starts.
Reading the failure
The shape of a failure points to its cause. Trowel lines visible through the surface point to too much adhesive or too large a notch, which Armstrong links to show-through.1 Adhesive squeezed up between tiles points to laying too soon.1 Planks that never stuck, with clean backs and no adhesive transfer, point to laying after the working time, or to a missed roll. Planks that stuck and then released weeks later, with soft or stringy adhesive, point to moisture or alkalinity in the slab.4 Pull a failed plank and look at both surfaces before deciding on a repair. Photograph them for the file.
Rolling loads and early traffic
Commercial floors take carts and beds soon after installation. Armstrong names its spray adhesive and its epoxy adhesive as its two options suitable under hospital beds.1 FloorFolio names a separate adhesive for heavy rolling loads or moisture conditions.5 Choose the adhesive for the traffic, and keep heavy loads off until the label allows.
The checklist
- Use the trowel notch on the adhesive label, and check it for wear.
- Spread only what can be covered within the working time.
- Lay at the right point: wet set or dry to the touch, as the label says.
- Test and condition the slab; investigate slow setting before laying.
- Roll and cross-roll with the roller the guide names, then check and roll again.
For raised edges after installation, see plank lippage.
Sources
- Armstrong Flooring, “Adhesives FAQs”. armstrongflooring.com/commercial/en-us/resources/flooring-faqs/adhesives
- EverStep Flooring, “LVP Glue Down Installation Guidelines”. everstepflooring.com/technical/lvp-glue-down-installation-instructions/
- Daltile, “ProSeries Luxury Vinyl Flooring Installation & Care Guide (Rigid Core Click, Glue Down)”. s1.img-b.com/build.com/mediabase/specifications/daltile/1996309/daltile-
- INSTALL (International Standard & Training Alliance), “Avoiding Moisture Mistakes in Substrate Preparation - INSTALL Floorcovering Professionals”. installfloors.org/news-events/avoiding-moisture-mistakes-in-substrate-pr
- FloorFolio, “Installation Guide 2025”. floorfolio.com/wp-content/uploads/2025/FloorFolio-Installation-Guide-202
General information for the flooring trade. This article was drafted with AI assistance and checked against the sources listed above; the manufacturer's current instructions and the project specification govern any real job. If something here is wrong or out of date, tell us.