 SW-04 · LVP & Vinyl Installation
Click-lock vinyl floats on a floor but not on a stair: guides send steps, landings and ramps to their glue-down method.1 Stair nose moldings are bonded with polyurethane adhesive; one maker's instructions call for an S-shaped bead, at least 4 hours before walking on the stair, and 24 to 48 hours before full traffic.2 Flush nosings need a shim; overlap nosings do not.3
Stairs take the hardest wear in any building. Every step loads the nosing, the edge where the tread turns down to the riser. Feet scuff it, heels strike it, and on the way down most of a person's weight lands on it. A floor that has to move sideways, as a floating floor does, has no place on a surface like that. That is why the installation documents treat stairs as a separate job.
Stairs are glued, not floated
EverStep's click-lock instructions say it plainly. In some cases it may be necessary to adhere the vinyl in special-needs areas such as steps, ramps and landings, and installers should follow the glue-down instructions there.1 A floating tread can shift under load, and a shifting tread on a stair is a trip hazard as well as a failed floor. On stairs, every piece is bonded to the substrate: tread, riser and nosing.
That has practical consequences. The adhesive must suit the substrate, which on stairs is often wood. The planks on the tread are cut to depth and glued down. The riser pieces are glued to the riser. The nosing caps the edge and ties the two together.
Flush or overlap stair nose
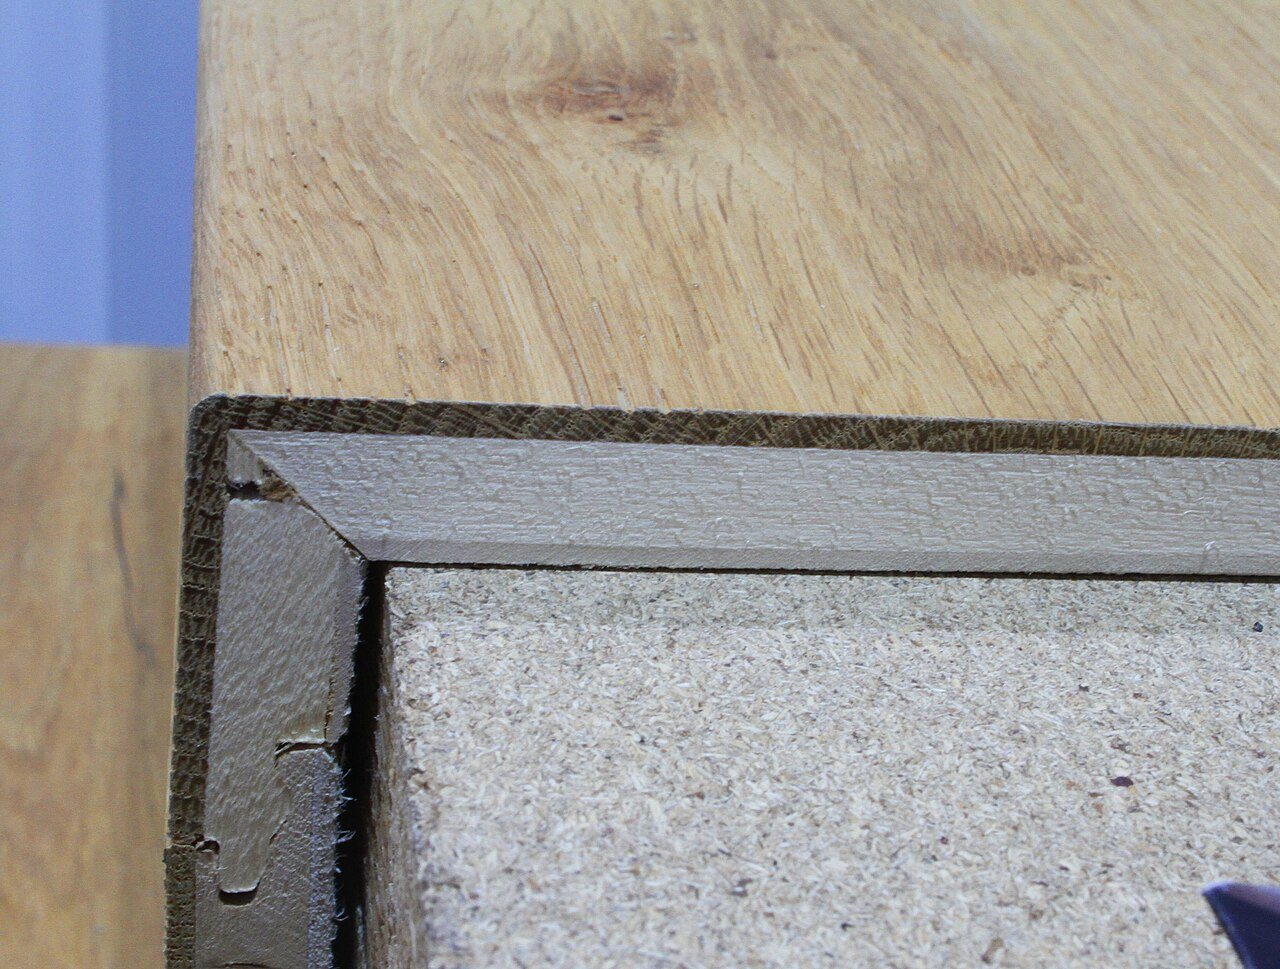
Vinyl stair nose moldings come in two main forms. The Mohawk flush-mount vinyl stair nose instructions describe both, and the Zamma instructions use the same pattern. For a flush installation, a matching shim goes on the edge of the stair tread so the nose sits level with the plank. For an overlap installation, no shim is required; the nose laps over the edge of the flooring.3 2 The flush version gives a cleaner line; the overlap version is simpler and more forgiving of plank thickness.
Elite's Välinge-lock guide describes its stair nose molding as the profile used to finish flooring on landings and stair edges.4 Match the nose to the flooring line and thickness. A nose designed for one product's height can leave a step or gap with another.
The adhesive and the bead
The nose is the piece most likely to come loose, so the bond matters. The vinyl stair nose instructions call for polyurethane adhesive on the underside, applied as an S-shaped bead on the ribbed surface of the nosing and a straight bead under the stand-off elbow.2 The trim is then positioned and pressed down firmly along its whole length.3 The bead pattern is not decoration. It spreads adhesive across the flat and down into the corner, where the nose takes its load.

Cure before use
A glued stair is not usable the moment the last nose goes on. The stair nose instructions say to let the adhesive cure for at least 4 hours before walking on it, and to wait 24 to 48 hours for full traffic exposure.2 On a commercial project that means closing the stair, or providing another route, for the cure time. Put it in the schedule, because a stair that cannot be closed cannot be done in one pass.
Temperature affects cure as much as time. For stair treads, American Floor Mats asks for materials, room and adhesives to be no less than 70 degrees Fahrenheit for 48 hours before, during and after installation.5 A cold stairwell slows cure and weakens the bond.
The step must fit the tread
Stair parts only bond where they touch. American Floor Mats says to install treads only on smooth, dry interior steps whose shape matches the underside of the tread, particularly where the flat of the tread meets the nosing, and calls a tight fit essential.5 It recommends epoxy nose caulk on all stair tread installations, to fill the space under the nosing.5 The same logic applies to vinyl plank nosings. A rounded old nose, a chipped edge or a gap under the nose leaves the profile unsupported, and an unsupported nose cracks or works loose.

Commercial stairs
Commercial stairs carry more traffic, and they usually have code-driven requirements for nosing visibility and slip resistance. Many commercial stairs use one-piece rubber or vinyl treads with integral nosings rather than planks and a separate nose. American Floor Mats does not recommend installing rubber treads on exterior steps.5 For tread systems, contrasting nosings and the details that prevent callbacks, see commercial stair tread details.
A stair checklist
- Glue every stair part; use the flooring's glue-down instructions, not the floating method.
- Choose flush or overlap nose to match the flooring line, and shim flush noses.
- Prepare each step so the nose and tread are fully supported.
- Apply the adhesive in the pattern the nose maker specifies.
- Keep the stair warm and closed for the full cure time.
Sources
- EverStep Flooring, “LVP Click Lock Installation Guidelines”. everstepflooring.com/lvp-click-installation-guidelines/
- Zamma (via Lowe's), “Vinyl Stair Nose Moulding Installation Instructions”. pdf.lowes.com/productdocuments/6feda80c-ee0a-4738-a185-048bf12d43d7/6121
- Mohawk (via Lowe's), “Vinyl Flush Mount Stair Nose Installation (Mohawk)”. pdf.lowes.com/productdocuments/6b8254b0-66ec-46da-8043-fa274522889e/6561
- Elite Flooring, “Välinge Installation Guide (Woodlands)”. eliteflooringusa.com/links/install-instructions/Elite-Installation-Guide
- American Floor Mats, “How to Install Stair Treads”. americanfloormats.com/content/product/file/document/How%20to%20Install%2
General information for the flooring trade. This article was drafted with AI assistance and checked against the sources listed above; the manufacturer's current instructions and the project specification govern any real job. If something here is wrong or out of date, tell us.