A single gouge in click-lock LVP can feel like a pebble in your shoe. The floor still works, but your eye goes straight to the damage every time.
The good news is you can often replace LVP plank sections in the middle of a floating floor without unclicking rows back to a wall. The bad news is that the repair only lasts if the new plank is supported, aligned, and bonded the right way.
Below is the cut-out method many installers use when a full pull-back would mean moving heavy casework, island stools, or a packed sales floor display.

When a single-plank click-lock repair is the right call
The cut-out method is best when the floor is flat, stable, and the damage is truly isolated. Think dropped tools, a deep scratch from a refrigerator wheel, or a manufacturing defect that showed up after install.
It’s also a strong option in commercial spaces where downtime matters. Pulling apart half the room can turn a one-plank issue into a full day, plus the risk of breaking multiple locks on the way back.
That said, don’t force a single-plank swap if the floor is telling you a bigger story:
- If you see peaking, widespread gapping, or bounce, address subfloor flatness and expansion constraints first.
- If water got under the floor (dishwasher leak, ice maker line), check the underlayment and seams before you replace anything.
- If multiple planks are chipped in the same traffic lane, the “one bad board” might be a wear-layer or maintenance issue.
For pros, it also helps to zoom out and watch what’s happening in the market. Recent flooring industry news points to more product education and tighter performance targets. Trade groups have been pushing more installer training (tile contractors, in particular, have had a busy early-2026 schedule), and manufacturers have been refining testing methods for chemical inputs like PFAS. That kind of flooring news matters to repairs, because customers now ask tougher questions about what’s in the product and how it holds up.
At the same time, flooring trends for 2026 keep leaning toward realistic visuals and stronger cores. Industry voices have signaled improving outlooks for laminate demand, continued interest in wood with better durability features, and steady tile growth. You’ll see many of these newest flooring trends and products in the annual flooring shows calendar, where locking systems, thickness, and wear layers are front and center. Those product changes can affect repairs because click profiles and tolerances vary by run, even within the same SKU coming out of different flooring manufacturing factories.
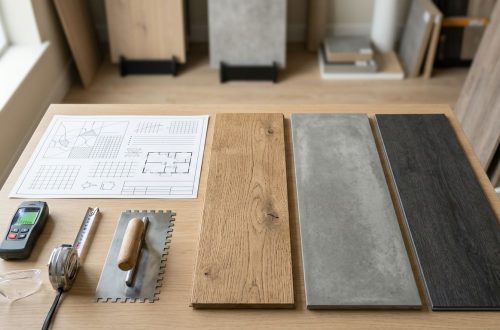
Tool list and materials that make the repair hold tight
A clean cut-out is about control, not brute force. The goal is to remove one plank while leaving neighboring tongues and grooves as untouched as possible.

Here’s a practical kit that works for most rigid-core and WPC/SPC click-lock jobs.
| Tool or material | Why it matters |
|---|---|
| Oscillating multi-tool with wood/plastic blade | Makes shallow, accurate cuts without over-penetrating |
| Sharp utility knife and extra blades | Scores finish layers and trims the replacement plank cleanly |
| Straightedge or framing square | Keeps cuts parallel so gaps don’t “walk” |
| Painter’s tape | Protects adjacent planks and helps mark cut lines |
| Thin pry bar or stiff putty knife | Lifts cut sections without cracking edges |
| Sharp chisel (1 inch works well) | Pops out remaining lock strips and cleans corners |
| Vacuum with crevice tool | Removes grit that can hold the plank up and create lippage |
| Suction cup (optional) | Helps control the new plank during placement |
| Flooring repair adhesive (hybrid/MS polymer or urethane style) | Bonds the modified edges so the plank can’t drift |
| Blue tape plus weight (books, tile boxes, sandbag) | Holds seams tight while adhesive cures |
Two material tips save headaches:
First, color and gloss can shift between batches. If you can, pull from attic stock from the same job. If you must order, match not only the SKU but also the production run details when available, since click geometry can differ between newest flooring products lines.
Second, remember that some suppliers market specialty comfort products such as thicker vinyl builds (some as thick as 1/2 inch overall) and cork lines promoted as naturally comfortable and moisture resistant. Great for the customer, but it means you should confirm thickness and underlayment stack-up before you set the replacement, or you’ll chase height mismatch.
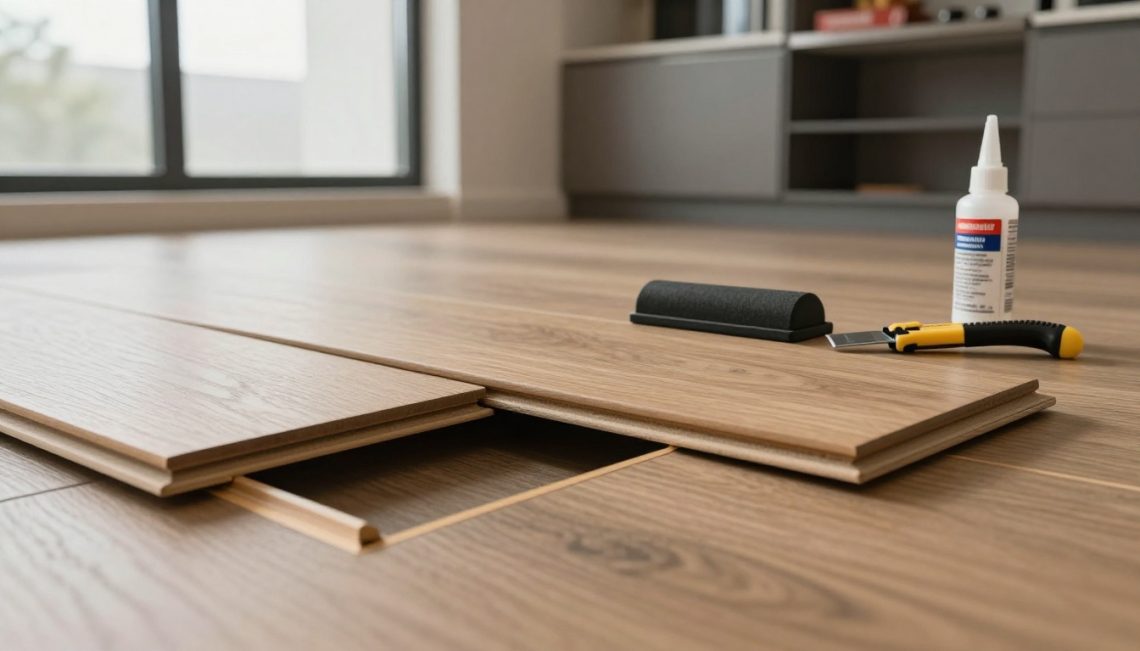
The cut-out method to replace a damaged click-lock LVP plank (without pull-back)
This method works by removing the damaged plank, then installing a new plank that has been slightly modified so it can drop in and bond to the surrounding locks.
Step-by-step
- Confirm it’s a floating click-lock floor. If the floor is glued down, treat it as a different repair.
- Tape and mark your cut lines. Apply painter’s tape around the plank perimeter. Mark a rectangle inside the plank, leaving about 1 to 1.5 inches from each edge.
- Set blade depth and cut the inner rectangle. Use the oscillating tool to cut the rectangle and remove the center section first. Stay shallow so you don’t scar underlayment or a moisture barrier.
- Slice from the center to each corner. Cut diagonals from the inner opening out toward the four corners. This breaks the plank into triangles that release easier.
- Lift out the pieces carefully. Use a putty knife or thin pry tool. Work inward to outward so you don’t pry against neighboring edges.
- Remove leftover lock strips. You’ll usually have bits of tongue or groove still sitting under adjacent boards. Chisel them out cleanly, especially on the long sides.
- Vacuum and check the base. Grit causes lippage. Also check the underlayment for tears and patch if needed.
- Prep the replacement plank. Dry fit first. Then modify it so it can drop in: typically you remove the lower lip of the groove on the sides that need to “receive” the surrounding planks, while keeping the top edge for alignment.
- Apply adhesive where it counts. Run a controlled bead on the subfloor in a few spots (not a puddle), and a thin bead along the modified groove area. Don’t glue the floor to the wall or kill the expansion gap.
- Set the plank, tape it tight, and weight it. Press seams closed, wipe squeeze-out fast, then tape across seams and set weight until cured per adhesive directions.
A quick quality check after cure: run your fingernail across each seam. If it catches, the plank is proud or the edge isn’t seated.
Common mistakes that cause call-backs
Most failures come from one of three issues: debris under the plank, over-trimming the lock (so it can slide), or under-bonding (so traffic pumps it loose). If you’re going to replace LVP plank units for customers, treat seam support like a structural detail, not a cosmetic one.
Keeping up with products and training so repairs stay reliable
Single-plank repairs are getting more important, not less. Customers buy floors for long wear, and they expect serviceability to match.
Staying current helps, especially as locking systems change with newest flooring trends and products. The annual flooring shows circuit is still where many dealers and manufacturers compare new click profiles in person, and where reps explain what changed from last year’s run. On the training side, early-2026 calendars have included expanded hands-on education, and that culture of training is spreading across categories.
If you work with retailers or supply chain teams, it’s also worth watching product safety and compliance updates as part of regular flooring industry news. When manufacturers introduce new testing approaches for inputs, it can influence spec sheets, customer questions, and even what adhesives your team prefers for repairs.
Conclusion
A mid-floor plank swap doesn’t have to turn into a full-room teardown. With controlled cuts, a properly trimmed replacement, and the right adhesive and clamping pressure, you can replace LVP plank damage so it stays tight under traffic.
The real win is consistency: document your method, keep a dedicated repair kit, and track changes in flooring trends so your approach matches what’s shipping now. What’s one repair detail your team standardizes, blade depth, adhesive choice, or cure-time discipline?