Basements and crawl spaces don’t fail floors with drama. They do it quietly, with water vapor that creeps up through concrete or soil like steam from a pot with the lid half on.
Luxury vinyl plank may be marketed as waterproof, but the room underneath still matters. If you pick the wrong LVP moisture barrier, you can trap moisture, soften adhesives, grow odor, or trigger plank edge lift. If you skip the barrier when you needed it, you can end up with the same problems.
This guide breaks down how to choose the right moisture barrier for basements and crawl spaces, what to test first, and the install details that separate a clean job from a callback.
Why basements and crawl spaces are hard on LVP
Concrete and soil constantly exchange moisture with the air. The problem is rarely a puddle, it’s vapor pressure and humidity.
Common moisture paths under LVP:
- Vapor transmission through concrete (slabs are porous).
- Ground moisture in crawl spaces (evaporation from exposed soil).
- Seasonal humidity swings that push moisture toward cooler surfaces.
- Bulk water events (drainage failures, leaks, storm seepage).
Even when the LVP surface “survives,” moisture can still affect the system: underlayment can stay damp, microbial growth can start at the perimeter, and slab alkalinity can attack certain adhesives.
Start with moisture testing (before you buy materials)
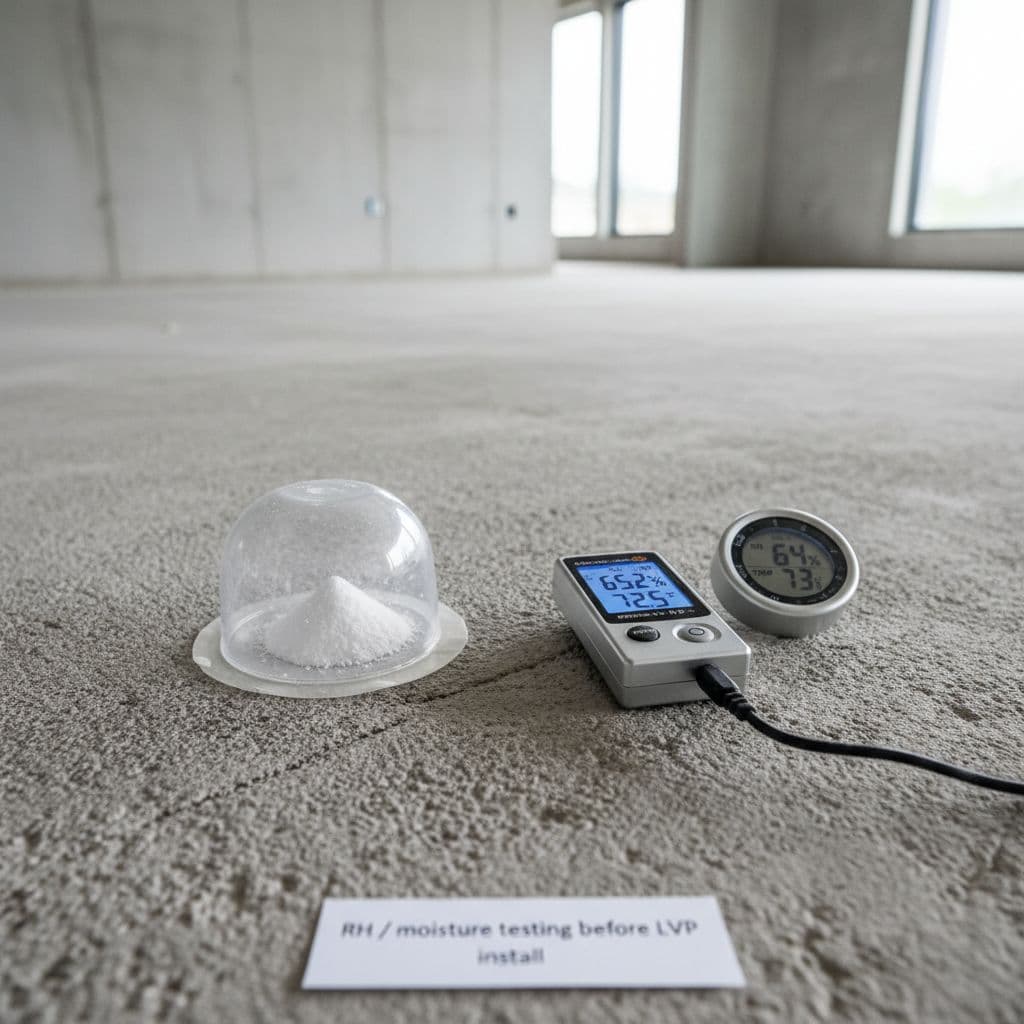
A moisture barrier choice should be driven by the site conditions, not habit. For basements, that means testing the slab and measuring indoor conditions.
Two practical checkpoints:
- Concrete moisture testing (many specs allow either in-slab RH probes or calcium chloride kits, depending on the product system).
- Room conditions (use a hygrometer to confirm temperature and relative humidity match product requirements).
If the slab fails the flooring manufacturer’s limits, a basic poly sheet may not solve it. At that point you’re usually looking at a rated moisture mitigation coating or a different assembly. Manufacturer instructions matter because warranties follow the book, not the installer’s best intentions. A good example of how detailed those requirements can be is in an LVP installation guide like this one: Architect’s Choice LVP installation guide.
Basement LVP moisture barrier options (and when each makes sense)
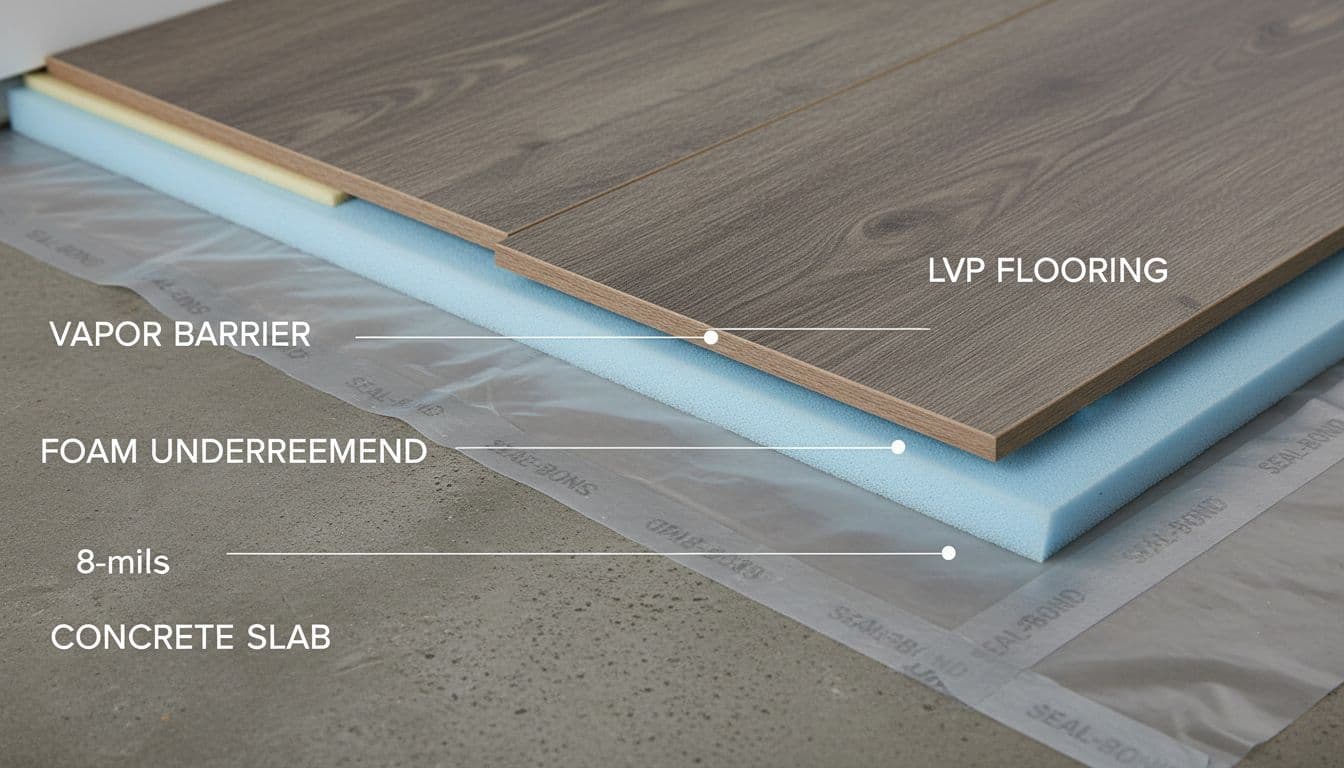
Basements usually come down to one question: are you stopping normal vapor diffusion, or are you managing a high-moisture slab?
Here’s a quick comparison that works well for most projects.
| Moisture barrier type | Typical use | Best fit for | Watch-outs |
|---|---|---|---|
| 6–10 mil polyethylene sheet | Basic vapor barrier under floating LVP | Slabs with acceptable moisture results | Seams and perimeter sealing decide success |
| Underlayment with attached vapor film | Cushion plus vapor control | Floating click LVP where product allows it | Don’t double up layers unless approved |
| Liquid-applied moisture mitigation (epoxy/urethane systems) | Moisture control on high readings | Commercial-level slab moisture, problem basements | Requires surface prep and curing time |
| Dimple membrane or raised subfloor panels | Creates an air space above slab | Slightly uneven slabs, comfort upgrades | Adds height, watch doors and stairs |
If you’re dealing with chronic seepage or hydrostatic pressure, fix the water entry first. A moisture barrier isn’t a sump pump.
For general background on how moisture moves through slabs and why basement barriers work, this overview is a solid refresher: Moisture barrier basics for basement floors.
Crawl space ground vapor barriers (the floor above depends on them)
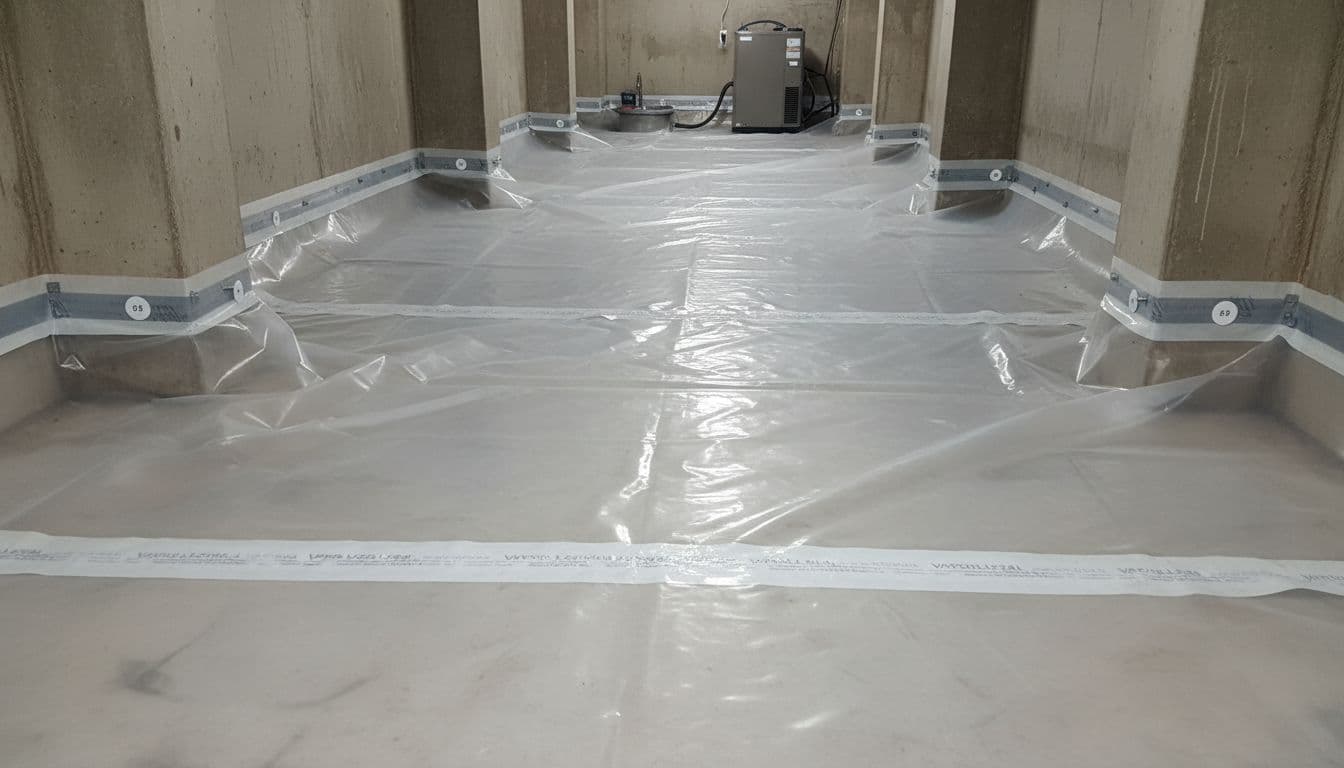
If the project includes a crawl space, treating the floor from above is only half the job. Exposed soil is a moisture generator, and it will push humidity up into the framing and subfloor.
A crawl space vapor barrier works when it’s handled like a system:
- Cover all soil with durable poly (heavier is better in service areas).
- Overlap seams and tape them, don’t rely on weight alone.
- Run the barrier up piers and walls and mechanically fasten it.
- Seal vents or condition the space when the building design calls for it.
- Add humidity control (dehumidifier or conditioned air) when needed.
This isn’t just about the LVP. It protects joists, insulation, fasteners, and the long-term indoor air quality upstairs.
For teams that want a building-science view of how humidity hurts floors and assemblies, this article is useful context: Prevent moisture damage under luxury vinyl flooring.
The install details that prevent trapped moisture and callbacks
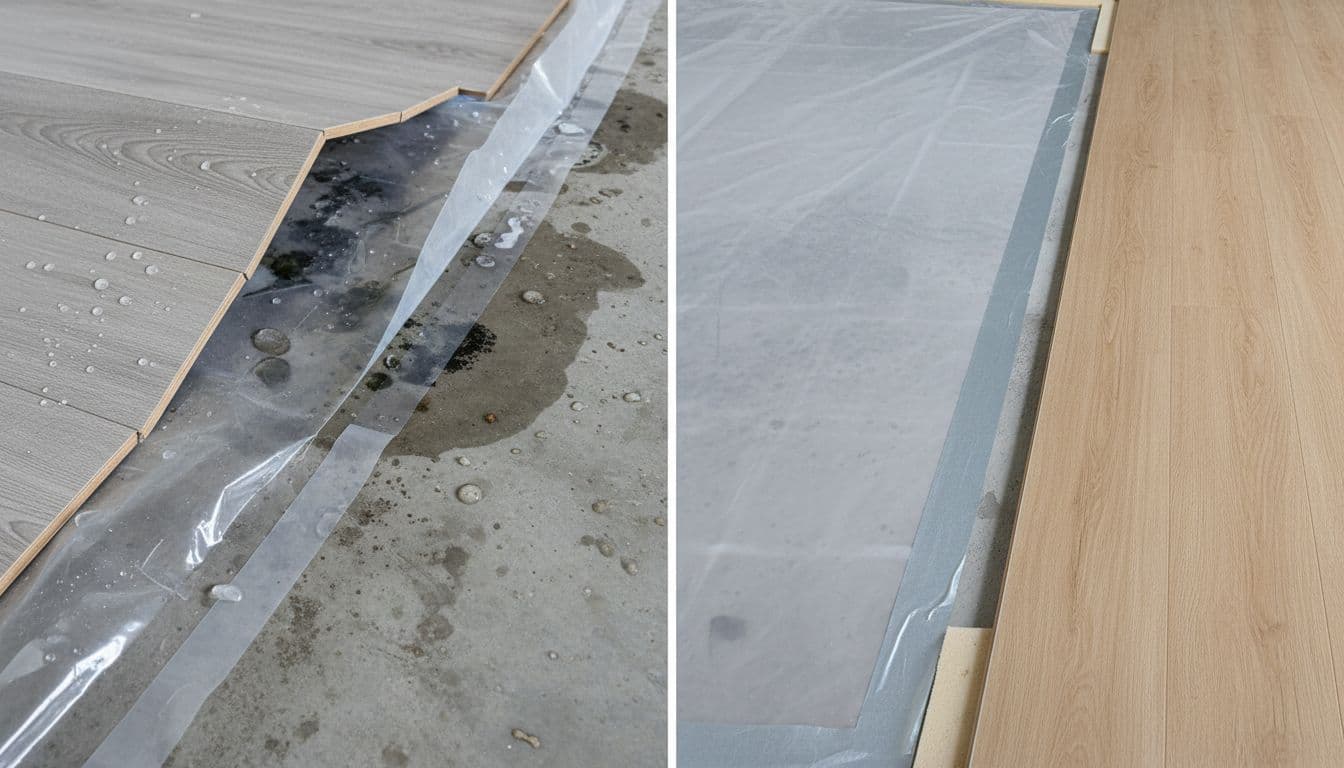
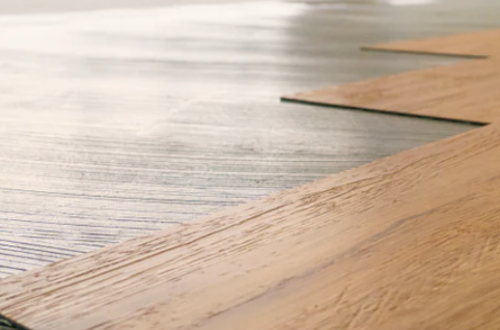
Most failures blamed on “bad LVP” are really bad detailing. Moisture barriers don’t work in theory, they work at seams, edges, and penetrations.
Key details that matter on real jobs:
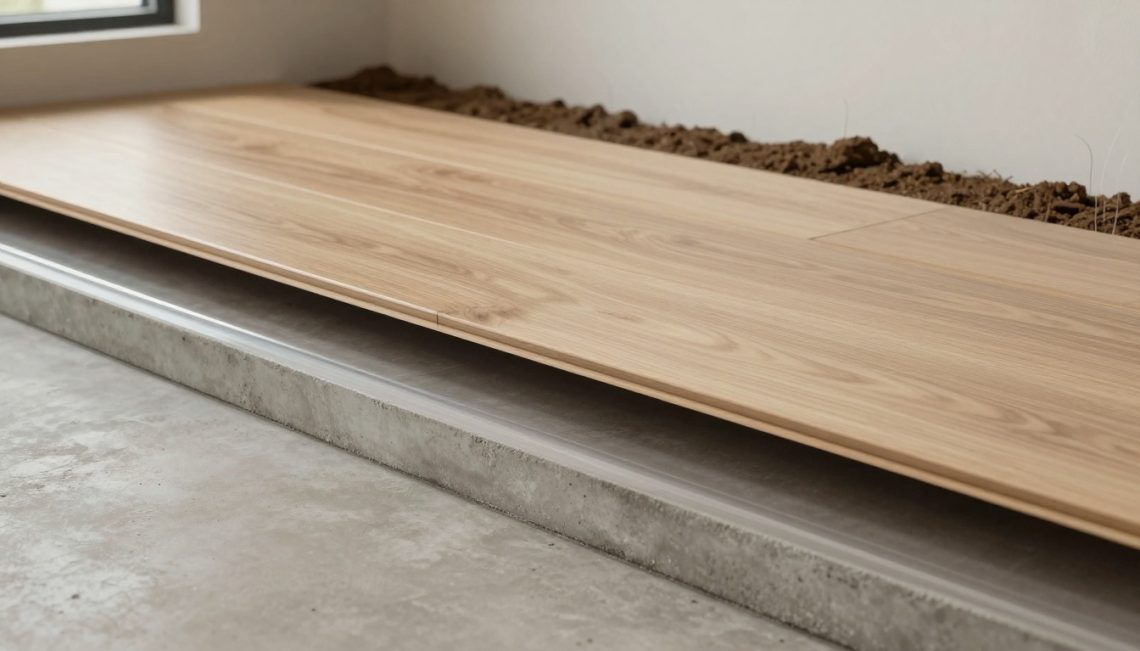
- Clean slab first: dust keeps tape from bonding and coatings from adhering.
- Seam overlap and tape: a taped overlap is the difference between “barrier” and “plastic loosely laid.”
- Perimeter turn-up: bring poly up the wall slightly, then cover with baseboard (trim later).
- Don’t trap water: if bulk water is present, barriers can hold it in. Dry the slab and solve the source.
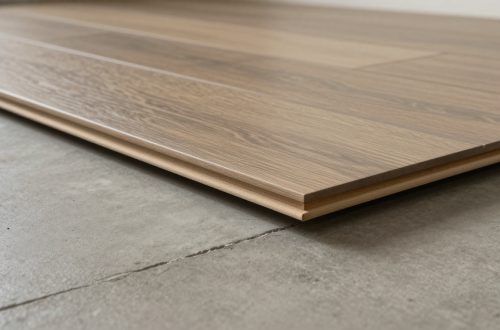
- Match the barrier to install type: floating click LVP, loose lay, and dryback (glue-down) often have different moisture specs and approved systems.
A practical underlayment refresher for LVP, including basement talk, is here: How to choose underlayment for LVP flooring.
One detail close-up worth copying on every job
When installers ask what “good” looks like, show them a clean overlap with full tape contact. No wrinkles, no dusty slab, no half-stuck edges.
What’s changing in 2026: moisture control is part of the product conversation
Moisture management used to be treated like a jobsite problem only. Lately, flooring industry news shows the product side paying more attention too.
A few signals worth tracking:
- Underlayment makers are pushing harder into moisture and “waterproof” positioning, which shows up in flooring news like this: Underlayment suppliers get in on the waterproof act.
- Manufacturers are also tightening material accountability. For example, late-2025 reporting highlighted new lab methods aimed at detecting PFAS in manufacturing inputs, a sign that compliance and testing are becoming part of everyday operations in flooring factories.
- On the sales side, consumer-facing flooring trends continue to favor basements as livable space, which keeps LVP demand high. A quick snapshot of 2026 newest flooring products and trends is summarized here: The flooring trends you’ll see everywhere in 2026.
For contractors and dealers, this matters because specs shift quickly. Staying current on new flooring techniques and approved moisture systems protects margins in the flooring business.
Conclusion: choose the barrier that matches the moisture, not the room name
A basement or crawl space isn’t automatically a problem, but it’s never a place to guess. Test the slab, control humidity, then pick an LVP moisture barrier that fits the install method and the moisture level. When seams are overlapped, taped, and detailed at the perimeter, the floor system stays stable and the callback rate drops.
If you’re quoting a basement or crawl job this month, the best next step is simple: confirm moisture numbers first, then build the assembly around them.