Nothing ruins a new install faster than LVP plank gaps you can see from across the room. One day the floor looks tight and clean, the next it looks like a zipper that wasn’t fully closed.
The good news is most luxury vinyl plank seams opening up trace back to a small set of causes, and many fixes are quick once you know what you’re chasing. This guide breaks down the 10 most common reasons planks separate after installation, plus practical fixes that contractors can use without turning the jobsite upside down.
First, confirm what kind of LVP plank gaps you’re seeing
Start by measuring the gap and mapping where it happens. A 1 mm to 2 mm opening can be “movement plus stress” rather than a failed product, but patterns matter.
If gaps show up mostly at end joints, suspect short-board locking engagement, plank damage, or installation technique (too much angle, not enough lift, or tapping the wrong direction). If gaps are mostly on long seams, look harder at subfloor flatness, debris, or a floor that’s pinched at the perimeter.
Also note timing. Gaps that appear right after install often point to incomplete lock, debris, or subfloor issues. Gaps that show up after a cold snap, a heat wave, or strong sun can be normal seasonal movement that became visible because something else is restricting the floor.
Before you start pulling trim, try a simple test: put painter’s tape arrows on 4 to 6 boards around a gap and check again after 24 hours. If the arrows drift in one direction, the floor is walking. That usually means friction (pinch points) or a slope causing movement over time. For repair methods and tools, compare approaches in guides like how to fix LVP flooring gaps, then match them to the cause below.
The 10 most common causes of vinyl plank seams opening up (and the fastest fixes)
Most LVP is a floating system. That means the floor expands, contracts, and shifts as a single sheet. When something interrupts that movement, the stress often shows up as LVP plank gaps at the weakest joint.
Here are the 10 causes seen most often on service calls, and fixes that usually work quickly.
| Common cause | What it looks like | Quick fix (field-tested) |
|---|---|---|
| 1) Planks not fully clicked | Gaps appear right away, often random | Re-seat the row using a tapping block; work from a free edge toward the gap |
| 2) Debris in the joint or under edge | One spot won’t close, edge feels “high” | Pull the board, vacuum, re-install; don’t try to force a lock over grit |
| 3) Subfloor not flat (humps or dips) | Same seam re-opens after “fixing” | Identify high/low spots, correct subfloor, then re-install affected area |
| 4) No perimeter expansion space | Gaps appear mid-field, sometimes with wall pressure | Remove base/quarter round, cut back edges to restore gap, re-set trim |
| 5) Heavy fixtures pinning the floor | Gap line starts near an island or built-in | Relieve the pinch (undercut, isolate, or transition); re-seat planks |
| 6) Temperature swings or direct sun | Gaps vary by time of day/season | Add window coverings, manage HVAC, check that expansion gaps exist |
| 7) Poor acclimation or storage | Multiple small gaps after first week | Stabilize room temp/humidity; re-seat joints once material is stable |
| 8) Damaged locking profile | One board always fails at same corner | Replace the plank; damaged locks rarely “heal” with tapping |
| 9) Wrong underlayment or double pad | “Spongy” feel, joints flex and separate | Remove extra cushion, follow manufacturer pad spec, re-install section |
| 10) Install direction and floor “walking” | Gaps drift across room over time | Use proper transitions, correct pinch points, consider adhesive perimeter per spec |
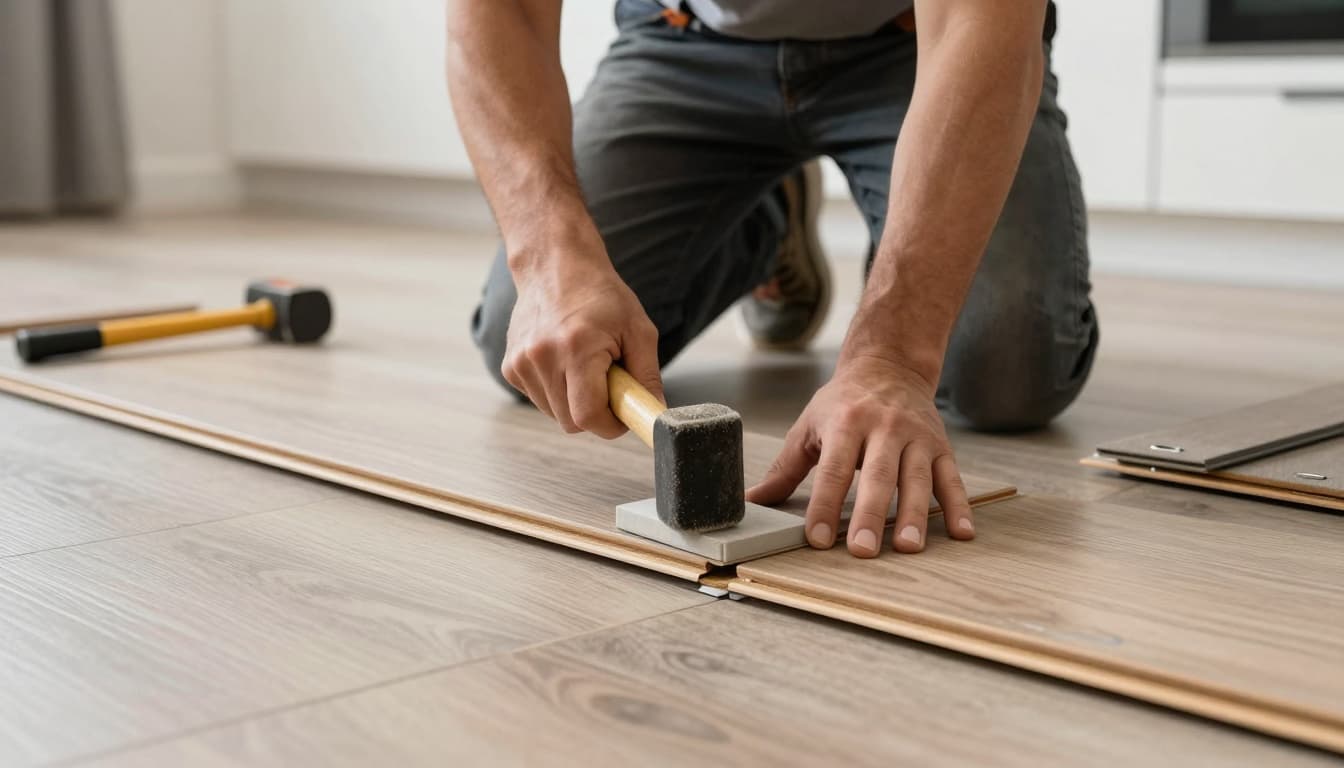
A practical note on repairs: if the gap is small and the locking system is intact, “re-seating” is often enough. Many crews use a suction cup puller or a floor gap tool (the kick-type puller) to shift a plank back into place, then lock it with a few controlled taps. If the gap returns, stop repeating the same trick and hunt the restraint or the subfloor issue.
For separation root causes and how movement behaves in floating floors, this overview of why vinyl plank flooring separates is a useful cross-check.
A short prevention plan crews can use on every LVP job
Most callbacks for LVP plank gaps come from repeatable misses. The fix is boring, but it works.
Pre-check flatness and document it. Don’t eyeball. Use a long straightedge and mark problem areas before the first plank goes down. It’s faster than a tear-out.
Control pinch points. Expansion space at the walls is only part of it. Check islands, vanities, door jambs, transitions, and floor registers. Floating floors need freedom.
Set expectations about sun and HVAC. LVP is stable compared to wood, but it’s still sensitive to temperature. A sunny slider can create daily movement. That’s not “flooring factories cutting corners,” it’s physics plus jobsite reality.
Stay current. Crews that follow flooring news and flooring industry news tend to get fewer surprises, because they hear about locking-profile changes, updated underlayment rules, and product revisions sooner. For broader flooring trends shaping specs and client requests, see 2026 flooring trends experts are watching. And for business-side context that affects purchasing and scheduling, this Executive Outlook for 2026 is worth skimming.
January is also peak season for flooring shows, where manufacturers roll out newest flooring products (and, yes, the newest flooring products) and installers pick up tips that don’t always make it into the box instructions. Training calendars matter too. In early 2026, installer education is getting more attention across categories, including expanded regional training opportunities from groups like NTCA. Staying sharp is part technique, part keeping up.
Conclusion
LVP plank gaps are usually a symptom, not the real problem. Close the seam, then track down what let the floor move, pinch, or flex in the first place. When you fix the cause, the quick fix lasts. If you’re seeing repeat separation in the same area, treat it like a diagnostic, not a cosmetic touch-up, and the floor will start acting like one solid surface again.