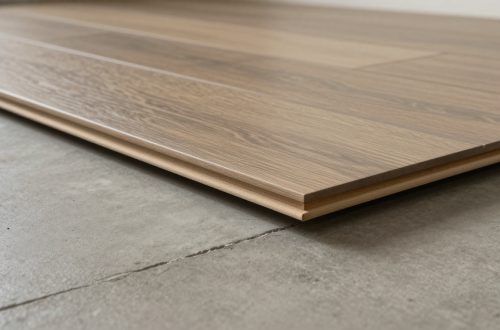
Click-lock LVP on uneven concrete is tough, but it’s also picky. Put it over a wavy concrete slab and it can sound hollow, unlock at the joints, or telegraph every ridge like a shirt over a bad undershirt.
The good news is luxury vinyl plank concrete prep doesn’t have to drag on for days. With a fast inspection routine, targeted grinding, and the right fill strategy, you can hit the flatness spec without turning the jobsite into a dust storm or a science project.

Start with the flatness spec (most failures begin here)
“Level” is not the goal. Flat is the goal. Concrete can be perfectly level and still have humps and dips that stress click-lock joints.
Subfloor preparation starts here. Most click-lock LVP brands call for a flatness spec within a small tolerance over a defined distance (often 3/16 inch over 10 feet, and 1/8 inch over 6 feet). Flatness tolerances vary by product line and core type, so treat those numbers as a common baseline, then confirm the exact flatness spec requirement on the carton, install guide, or technical data sheet.
If you’re managing installs across multiple crews or locations, measuring the same way every time matters. A simple, repeatable check prevents debates later when there’s a claim.
Use this quick field method:
- Pick the right straightedge: A 6-foot and a 10-foot straightedge cover most LVP specs.
- Map the slab: Use a laser level for initial mapping of the grid, then work in a grid (even a rough one) and mark high spots and low spots with a pencil or crayon.
- Measure gaps, not vibes: Use feeler gauges or stacked shims to quantify dips under the straightedge.
- Flag transitions and seams: Control joints, cold joints, and slab edges are where click-lock often complains first.
If you want a real-world view of how installers talk through slab tolerances and prep choices, this slab prep discussion for tile or LVP shows the same pain points you’ll see on commercial basements and retail remodels.
The payoff of this step is speed. Once the floor is “mapped,” you stop guessing and start correcting only what matters.
Grind high spots fast (and keep dust under control)
Grinding is usually the fastest way to grind high spots, especially at slab seams and trowel ridges. It also prevents the most common mistake: trying to bury a hump with patch, then chasing the hump farther out with more patch.
Start with the right setup. A 5-inch or 7-inch angle grinder with a diamond cup wheel works for small areas. For bigger footage, a walk-behind concrete grinder saves time and produces a flatter result with less gouging.
A practical tool shortlist (no fluff):
- Diamond tooling: Diamond cup wheel (or plate). Match grit level and bond type to the slab hardness when possible.
- Dust shroud + vacuum with HEPA filter: Dust control for silica dust is not “optional.”
- Good lighting: Raking light makes ridges and swales obvious.
- A straightedge at hand: Grind, check, grind, check.
Technique tips that speed up results:
Grind in controlled overlapping passes, and feather outward. If you “dig” in one spot, you create a dish that you now have to fill. After every short grinding session with the concrete grinder, vacuum, re-check with the straightedge, and re-mark. That loop keeps you from over-correcting.
Don’t grind through structural intent. Expansion joints and moving cracks should not be made “disappear” with aggressive grinding and hard fill. Your prep plan should respect movement, then your underlayment and layout plan should handle it.
For visuals you can share with a team (or a store manager who’s trying to understand why prep isn’t free), this concrete flooring installation photo library is a handy reference for common prep scenes and tools.
Fill low spots without wasting time (patching compound vs self-leveling compound)
Once the high spots are knocked down, low spots become honest. Now you can choose the fastest way to fill low spots that still cures hard and stable.
For small, shallow dips, a patching compound or skim coat is often the quickest path. You can trowel it tight, feather edges cleanly, and re-check within a short window. This is ideal for birdbaths, edge dips, and isolated low areas.
For wider or deeper lows, self-leveling compound, also known as floor leveler or self-leveling underlayment, tends to win on speed, especially when the concrete slab looks like gentle ocean swell across a room. The time savings come from coverage and flatness, not from mixing. You still have to prep like a pro with self-leveling compound.
Three details that separate clean self-leveling compound work from a callback:
Concrete primer is non-negotiable. Skipping concrete primer can cause pinholes, weak bond, or rapid water loss that kills flow. Mixing must be exact with a mixing paddle, because “a little extra water” often becomes soft topping or shrink cracks. Finally, plan your pour so it doesn’t trap you in a corner, and use a gauge rake, squeegee (and spiked shoes if needed) to help the floor leveler material meet its stated flow.
Moisture matters too. A concrete slab that’s too wet can break down adhesives, create mold risk under self-leveling compound, or cause mineral issues that show up later. Many specs reference industry-standard moisture testing methods, so document results when the job is sensitive or warranty-driven. Allow proper curing time before laying rigid flooring.
If you’re comparing flooring types on concrete slab and want a quick take on practical concerns like seams, humps, and underlayment choices, this LVP vs laminate on concrete Q&A reflects the same questions customers bring into stores every day.

A quick 2026 note for retailers and manufacturers
Prep standards aren’t getting looser. If anything, warranty scrutiny is increasing as click-lock continues to dominate, and as flooring manufacturing factories and retailers face more documentation requests when a claim lands, especially with luxury vinyl plank on concrete slab.
At the same time, the broader market is shifting. Trade coverage keeps pointing to performance upgrades in hard surfaces, more discussion around material chemistry and testing, and a renewed push for installer education. Training calendars are filling up, and annual flooring shows still matter because teams can see textures, cores, and underlayment systems in person, not just on a screen. Staying current with flooring industry news and flooring news helps sales teams set expectations early, before a customer thinks luxury vinyl plank can float over anything. Respect the curing time for self-leveling compound to avoid issues down the line.
When you’re planning assortments for the year, tie prep education to merchandising. The newest flooring trends and products often come with tighter tolerances, new locking geometries, or different underlayment rules. Buyers hunting newest flooring products at markets and reps pitching flooring trends should be paired with install managers who can translate those changes into field-ready prep standards.
Conclusion: Flat first, fast second, and quiet floors follow
Click-lock luxury vinyl plank doesn’t fail because the concrete slab is concrete, it fails because prep gets rushed or guessed. Measure to the spec, grind the highs before you fill, then choose patch or SLU based on the size of the problem, not habit. Document your checks, especially on bigger jobs, because subfloor preparation, the deciding factor in project success, is easier to defend when it’s repeatable. The floor should feel boring when you walk it, no clicks, no hollow spots, no surprises.